Mushroom Cultivation
248 Isolates
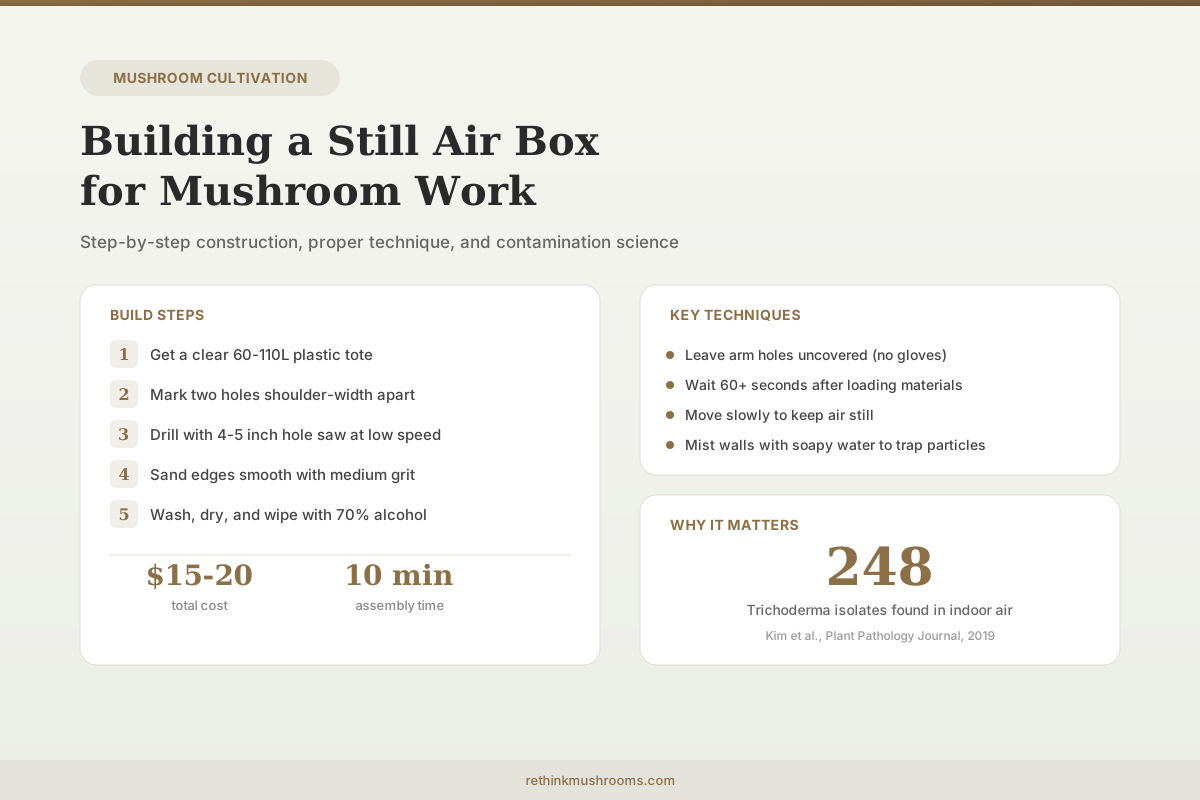
A 24-month air monitoring study identified 248 Trichoderma isolates from indoor air in mushroom cultivation houses, with T. harzianum dominant among four species detected.
Kim et al., Plant Pathology Journal, 2019
$15-20
total build cost
10 Minutes
assembly time
90%+ Reduction
in contamination vs open air
Kim et al., Plant Pathology Journal, 2019
 View as image ↗
Every inoculation, grain transfer, and agar plate you open exposes sterile material to whatever is floating in the air. In a typical room, that includes Trichoderma spores, Aspergillus, Penicillium, and bacteria by the thousands per cubic meter. A 24-month monitoring study of mushroom cultivation houses found 248 Trichoderma isolates in indoor air alone, with T. harzianum as the dominant species.[1] A still air box (SAB) is the cheapest, simplest tool for reducing airborne contamination during sterile work. It does not filter air. It settles it.
For the agar techniques you will use inside the SAB, see agar work for mushroom growers: isolating clean cultures. For identifying what went wrong when contamination appears, see common mushroom contamination types and how to identify them.
Key Takeaways
- A still air box works by allowing airborne contaminants (mold spores, bacteria) to settle out of suspension before sterile materials are opened, rather than filtering them
- Building one requires a clear 60-110 liter plastic tote, a 4-5 inch hole saw, and 10 minutes of assembly time at a cost under $20
- Disinfect the interior with 70% isopropyl alcohol before each use, then mist interior walls with dilute soapy water to trap remaining particles on surfaces
- Leave arm holes uncovered during work; covering them creates pressure differentials that pull contaminated air into the box with each arm movement
- Wait at least 60 seconds after loading materials before opening any sterile containers, allowing disturbed particles to settle
- A 24-month study identified 248 Trichoderma isolates from indoor air in mushroom cultivation houses, with T. harzianum dominant among four species detected (Kim et al., 2019)
Why Still Air Works
Airborne contaminants are particles: mold spores (Trichoderma, Aspergillus, Penicillium), bacterial cells, skin flakes, and dust carrying microbial hitchhikers. In open air, convection currents, HVAC systems, body heat, and movement keep these particles suspended and circulating. Every breath, arm wave, or fan gust redistributes them onto whatever surfaces are exposed.
In a closed box with no air movement, gravity does the work. Most fungal spores are 2-50 micrometers in diameter and settle at predictable rates in still air. Trichoderma spores, the most common mushroom cultivation contaminant, measure 2.5-4.5 micrometers. In completely still air, a 3-micrometer particle settles at approximately 0.03 cm per second, meaning a particle 30 cm above the work surface takes roughly 16 minutes to settle. Larger particles (dust, skin cells, bacterial clusters) settle faster.
The SAB exploits this physics. By enclosing a workspace and allowing air to become still, contaminants that were suspended in the air column gradually settle onto the floor and walls of the box rather than onto your agar plates, grain jars, or spawn bags. The workspace is not sterile. It has a dramatically lower concentration of airborne viable particles in the zone where you are working.
Research has confirmed the indoor air contamination problem. Kim et al. (2019) conducted 24 months of continuous air monitoring in oak mushroom (Lentinula edodes) cultivation houses and identified four Trichoderma species: T. harzianum, T. atroviride, T. citrinoviride, and T. pseudokoningii.[1] T. harzianum was dominant, and all four species produced extracellular enzymes (beta-glucosidase, cellulase, amylase, xylanase, protease) capable of degrading mushroom substrates. These spores originate from trashed sawdust media after harvest and from pre-contaminated media production sites.
Wang et al. (2016) characterized the diversity of Trichoderma species associated with green mold disease on Lentinula edodes in China, identifying multiple species that compete aggressively with mushroom mycelium for substrate resources.[2] Green mold is the single most common contamination failure in mushroom cultivation worldwide.
Materials and Tools
Required:
- Clear plastic storage tote (60-110 liters / 16-30 gallons). Clarity matters because you need to see your work. Sterilite and Hefty make common options in this size range
- Hole saw kit with a 4-5 inch (10-13 cm) diameter bit. This fits adult arms comfortably
- Drill (cordless or corded)
- Sandpaper (medium grit) for smoothing hole edges
For each work session:
- 70% isopropyl alcohol in a spray bottle
- Paper towels or lint-free cloths
- Small spray bottle of water with one drop of dish soap (for misting interior walls)
- Butane lighter or alcohol lamp (for flame sterilization of tools)
- Whatever materials you are working with: agar plates, scalpel, grain jars, syringes
Not required:
- Gloves attached to the arm holes. This is a common misconception. Covering the holes with attached gloves creates a sealed system where every arm movement compresses or expands the internal volume, forcing contaminated air in and out through any gap. Uncovered holes with still arms allow the air inside to remain still
- Tyvek sleeves. Optional but not necessary for hobby-scale work
- A HEPA filter. If you need filtered air, you need a laminar flow hood, not a SAB
Building the Box: Step by Step
Step 1: Mark the holes. Place the tote on a table, lid side down. On one long side, mark two circles spaced shoulder-width apart, centered vertically on the wall. The center of each hole should be approximately 15-20 cm from the bottom edge of the tote (which is now facing up) so your arms enter at a comfortable working height.
Step 2: Drill. Use the hole saw at low speed. Plastic totes crack easily at high RPM. Apply steady, light pressure. If the plastic starts to melt or deform, stop and let it cool. Some growers place painter's tape over the drill area to reduce cracking.
Step 3: Smooth the edges. Sand the inside and outside edges of each hole with medium-grit sandpaper. Sharp edges cut forearms during extended work sessions and create plastic dust that can contaminate your workspace. A smooth, rounded edge is faster to wipe down and more comfortable.
Step 4: Clean. Wash the interior with soap and water, rinse thoroughly, and dry. The tote is now ready for use.
Total build time: 10 minutes. Total cost: $15-20 depending on tote size and whether you already own a drill.
Using the SAB: Technique
Technique is more important than the box itself. A well-built SAB used poorly will contaminate more than a rough SAB used with disciplined technique.
Before Each Session
- Wipe down the inside of the box, the lid, and 6 inches around each arm hole with 70% isopropyl alcohol. Not 90%, not 99%. Ethanol and isopropanol at 70% concentration kill more effectively than higher concentrations because the water component helps the alcohol penetrate cell walls. Pure alcohol evaporates too fast to kill effectively
- Mist the interior walls and ceiling with a fine spray of water containing one drop of dish soap. This is not for sterile purposes. The thin water film traps particles that have settled on surfaces, preventing them from becoming re-aerosolized when you move your arms inside the box
- Load all materials. Place everything you will need inside the box before starting: plates, scalpel, lighter, jars, syringes, alcohol swab. Every time you add or remove something, you disturb the air. Load once
- Close the lid and wait 60 seconds minimum. You just loaded materials and moved air around inside the box. Give particles time to settle before opening any sterile containers
During Work
- Move slowly. Fast arm movements create air currents inside the box. The point of the box is still air. Every rapid gesture defeats that purpose
- Keep arm holes uncovered. Your arms seal the holes well enough by their presence. The critical thing is to avoid creating pumping action by rapidly moving arms in and out
- Flame sterilize tools between transfers. Hold scalpels and inoculation loops in the flame until the metal glows red. Let them cool for 10-15 seconds (not by touching anything) before using
- Work near the center of the box, away from the arm holes. The air is stillest at the farthest point from any opening
- Open containers for the minimum time necessary. Agar plates should be open for seconds, not minutes
Common Mistakes
Covering the arm holes with gloves or plastic. This transforms the SAB from an open-bottom still air system into a sealed pressure vessel. Every arm movement in a sealed system pushes or pulls air through any remaining gaps, creating exactly the kind of air movement you are trying to prevent.
Using the SAB near fans, HVAC vents, or open windows. Air currents from outside enter through the arm holes and create turbulence inside. Work in the stillest room available with HVAC turned off.
Not waiting after setup. Loading materials into the SAB disturbs all the air inside. Starting work immediately means working in turbulent air with high particle counts.
Skipping alcohol wipe-down between sessions. The interior surfaces accumulate settled contaminants from previous sessions. Each session starts with a clean interior.
SAB vs. Laminar Flow Hood
A laminar flow hood blows HEPA-filtered air (99.97% efficiency at 0.3 micrometers) in a uniform sheet across the work surface. Anything upstream of the work is bathed in clean air. Hoods cost $300-1,500 for DIY builds and $500-3,000+ for commercial units.
The SAB relies on settled, not filtered, air. It reduces airborne contamination in the work zone but does not eliminate it. For hobby growers doing occasional agar transfers, grain inoculations, and spawn work, the SAB handles the task. For production-scale operations requiring dozens of plates per session, liquid culture work, or commercial spawn production, a flow hood becomes the practical choice.
Jaramillo et al. (2024) tested ozone as a substrate treatment for controlling Trichoderma in Pleurotus ostreatus production and found that ozone alone was insufficient for highly contaminated substrates.[3] The finding reinforces that contamination prevention during inoculation and transfer (where the SAB or flow hood is used) is more effective than trying to decontaminate substrates after the fact.
For more on sterile technique fundamentals, see sterile technique for mushroom cultivation: laminar flow, SAB, and contamination prevention and sterile technique for mushroom growing: preventing contamination.
What You Can Do Inside a SAB
The SAB handles most sterile mushroom work:
Agar transfers. Open a colonized plate, cut a wedge of clean mycelium, transfer it to a fresh plate. This is the core use case. For detailed agar techniques, see agar work for mushroom growers.
Grain inoculation. Open a sterilized grain jar, add a piece of agar culture or liquid culture, close. The jar should be fully cooled and the agar or LC should be verified clean before starting.
Spore prints and spore syringes. Working with spore prints to inoculate agar or prepare spore syringes benefits from the reduced airborne particle count.
Liquid culture transfers. Drawing from or inoculating liquid culture jars using syringes. Keep flame-sterilized needles in mind.
What the SAB cannot do well: Large-scale spawn-to-substrate mixing, fruiting block preparation, or any task that requires vigorous physical movement inside the box. These tasks disturb the air too much and are better done in front of a laminar flow hood or in a cleanroom environment.
Contamination Prevention: The Bigger Picture
The SAB is one layer of contamination prevention. Effective mushroom cultivation combines multiple layers:
Preparation. Sterilize substrates and grain properly (15 PSI for 90-120 minutes for grain, 60-90 minutes for agar). No amount of clean-air technique compensates for improperly sterilized starting materials.
Transfer. Use the SAB or flow hood for all inoculations and plate transfers. This is where airborne contamination most commonly enters.
Incubation. Keep colonizing grain and agar in clean, still environments with stable temperatures. The Cabin-Sequestering method developed by Shi et al. (2019) provides a technique for removing bacterial contamination from established fungal cultures without antibiotics, producing clean colonies in 7-10 days.[4]
Monitoring. Check colonizing jars and plates daily for signs of contamination (green, black, or orange patches; bacterial slime; sour odors). Early detection prevents spreading contamination to clean work.
Nguyen et al. (2020) demonstrated that culture media choice affects mycelial growth rates, with PDA (Potato Dextrose Agar) best suited for P. eryngii while P. ostreatus grew better on YMA and MEA media.[5] Starting with the right media, proper sterilization, and clean transfer technique creates a complete contamination prevention system where the SAB is one critical component.
The Bottom Line
A still air box reduces airborne contamination during mushroom cultivation work by allowing suspended particles to settle out of the air column through gravity. Construction requires a clear plastic tote and a hole saw, costs under $20, and takes 10 minutes. Proper technique (alcohol wipe-down, wall misting, patience after setup, slow movements, uncovered arm holes) matters more than the box itself. Research confirms that airborne Trichoderma is the primary contamination threat in mushroom cultivation, and prevention during transfer is more effective than post-contamination treatment.
Frequently Asked Questions
Sources & References
- 1RTHM-00564·Kim, Jun Young et al. (2019). “Isolation and Characterization of Airborne Mushroom Damaging Trichoderma spp. from Indoor Air of Cultivation Houses Used for Oak Wood Mushroom Production Using Sawdust Media..” The plant pathology journal.Study breakdown →PubMed →↩
- 2RTHM-00455·Wang, Gangzheng et al. (2016). “Diversity and effect of Trichoderma spp. associated with green mold disease on Lentinula edodes in China..” MicrobiologyOpen.Study breakdown →PubMed →↩
- 3RTHM-00881·Jaramillo Mejía, Santiago et al. (2024). “Use of Ozone as a Substrate Treatment for the Control of Trichoderma in the Production of Pleurotus ostreatus..” Current microbiology.Study breakdown →PubMed →↩
- 4RTHM-00587·Shi, Xiao-Xiao et al. (2019). “A handy method to remove bacterial contamination from fungal cultures..” PloS one.Study breakdown →PubMed →↩
- 5RTHM-00645·Nguyen, Thanh M et al. (2020). “Effect of Different Culture Media, Grain Sources and Alternate Substrates on the Mycelial Growth of Pleurotus eryngii and Pleurotus ostreatus..” Pakistan journal of biological sciences : PJBS.Study breakdown →PubMed →↩