Growing Mushrooms at Home
7-14 days to first harvest
Oyster mushrooms can fruit in as little as seven to fourteen days after colonization, and can be grown on spent coffee grounds, straw, or cardboard, all validated as substrates in peer-reviewed research.
Grimm & Wösten, Applied Microbiology and Biotechnology, 2018
Trichoderma green mold
primary airborne contamination vector in indoor grows
Coffee grounds & straw
peer-reviewed validated substrates for beginner grows
Substrate quality
determines both mushroom safety and compound content
Grimm & Wösten, Applied Microbiology and Biotechnology, 2018
 View as image ↗
Before a mushroom appears, a web of white thread-like strands called mycelium spreads invisibly through whatever material you have given it to grow on. That mycelium is the organism. The mushroom is just its fruit, the above-ground structure it produces when conditions signal the right moment to reproduce. Understanding this early makes everything about your first mushroom grow make more sense: you are not planting seeds, you are establishing a fungal colony.
Most step-by-step grow guides treat mushrooms as a food project. This one covers the same ground but adds the biology behind each step, which makes the instructions stick better and the troubleshooting make sense. The species you choose determines what compounds you harvest; the substrate you use affects how the mycelium grows; and the contamination that kills most first grows is an airborne mold with a predictable life cycle you can work around.
For a broader overview of species, setup options, and what to expect from the hobby, see How to Grow Mushrooms at Home: A Complete Beginner's Guide.
Key Takeaways
- Oyster mushrooms are the best first species: they colonize fast, fruit reliably, and grow on straw or spent coffee grounds
- Substrate is the material the mushroom feeds on: straw, coffee grounds, and cardboard are all validated in research as functional beginner substrates (Grimm & Wösten, Applied Microbiology and Biotechnology, 2018)
- Grain source and substrate type measurably affect mycelial growth rate in oyster mushrooms; not all substrates are equivalent (Nguyen & Ranamukhaarachchi, Pakistan Journal of Biological Sciences, 2020)
- Green mold contamination (Trichoderma) is primarily spread through airborne spores, not surface contact; working in still air is the single most important contamination prevention step (Kim et al., The Plant Pathology Journal, 2019)
- Mushrooms bioaccumulate heavy metals from their substrate; substrate sourced from unknown or contaminated material poses a real health risk (Ab Rhaman et al., Journal of Fungi, 2021)
- Harvest just before or as the cap edges begin to flatten, before the veil underneath the cap tears; this is when flavor and compound density peak
Oyster Mushrooms: The Best Species for a First Grow (and Why)
Every beginner guide agrees on this, and the agreement is well-earned. Oyster mushrooms (Pleurotus ostreatus and related species) colonize substrate faster than most other species, tolerate a wider range of conditions, and fruit in as little as seven to fourteen days after colonization is complete. When they are ready to fruit, they tell you clearly: white pins appear at the surface and grow rapidly.
The alternative most people consider is shiitake. Shiitake is a rewarding species with a longer tradition of medicinal use, but it requires a harder substrate (usually hardwood sawdust or logs), takes six to twelve months to fruit on logs or several months on supplemented sawdust bags, and demands more precise environmental control. For a first grow, the feedback loop from oyster mushrooms is simply much faster and more forgiving.
Lion's Mane is worth mentioning because it is the species most associated with cognitive research, and it can be grown at home. But it is fragile in early stages and sensitive to CO2 levels during fruiting. Lion's Mane makes an excellent second or third project, not a first one. Once you understand how colonization behaves and how contamination presents, Lion's Mane becomes manageable.
A 2020 study by Nguyen and Ranamukhaarachchi tested how different grain sources and substrate types affected mycelial growth in oyster mushrooms (P. ostreatus) and found measurable differences between substrate options.[1] The practical takeaway: the substrate you choose is not arbitrary. It affects how fast the mycelium establishes, and faster colonization reduces the window in which competing molds can gain a foothold.
For a dedicated deep dive into oyster mushroom cultivation, see How to Grow Oyster Mushrooms at Home: The Easiest Beginner Mushroom.
What Substrate Actually Is, and Why Kitchen Waste Works Surprisingly Well
Substrate is the material the mushroom feeds on during colonization. It is to a mushroom what soil is to a plant, though the biology is different: the mycelium does not just sit in the substrate, it digests it, breaking down complex molecules into nutrients through enzyme secretion. Choosing the right substrate for your species is one of the two most important decisions in a first grow (the other being contamination prevention).
Oyster mushrooms are wood-decomposing fungi. In nature they grow on dead and dying hardwood trees. In cultivation, any high-carbon material with a reasonable nitrogen source can serve as substrate. Straw is the most common choice for beginners: it is cheap, widely available, and produces strong first flushes. Spent coffee grounds, cardboard, and agricultural byproducts like cottonseed hulls have all been validated as functional substrates in research settings.[4]
A 2018 review by Grimm and Wösten examined mushroom cultivation using agricultural and food-industry byproducts in the context of circular economy research, and confirmed that coffee grounds, straw, and cardboard produce functional substrate for oyster and other species.[4] From a practical standpoint, this means you can approach your local café for spent coffee grounds and have a scientifically validated substrate for free.
One safety note that most beginner guides skip: mushrooms bioaccumulate heavy metals from their substrate. A 2021 study by Ab Rhaman and colleagues found that substrate quality directly determines mushroom safety, with contaminated or low-quality substrates leading to measurable heavy metal accumulation in the fruiting bodies.[3] If you source straw from a farm that uses heavy pesticide applications, or coffee grounds from a café that sources from unknown origins, that chemistry can end up in your mushrooms. Straw from organic farms and coffee grounds from traceable sources are lower-risk choices.
For a detailed guide to choosing between substrate options by species, see Mushroom Substrate Guide: Choosing the Right Growing Medium.
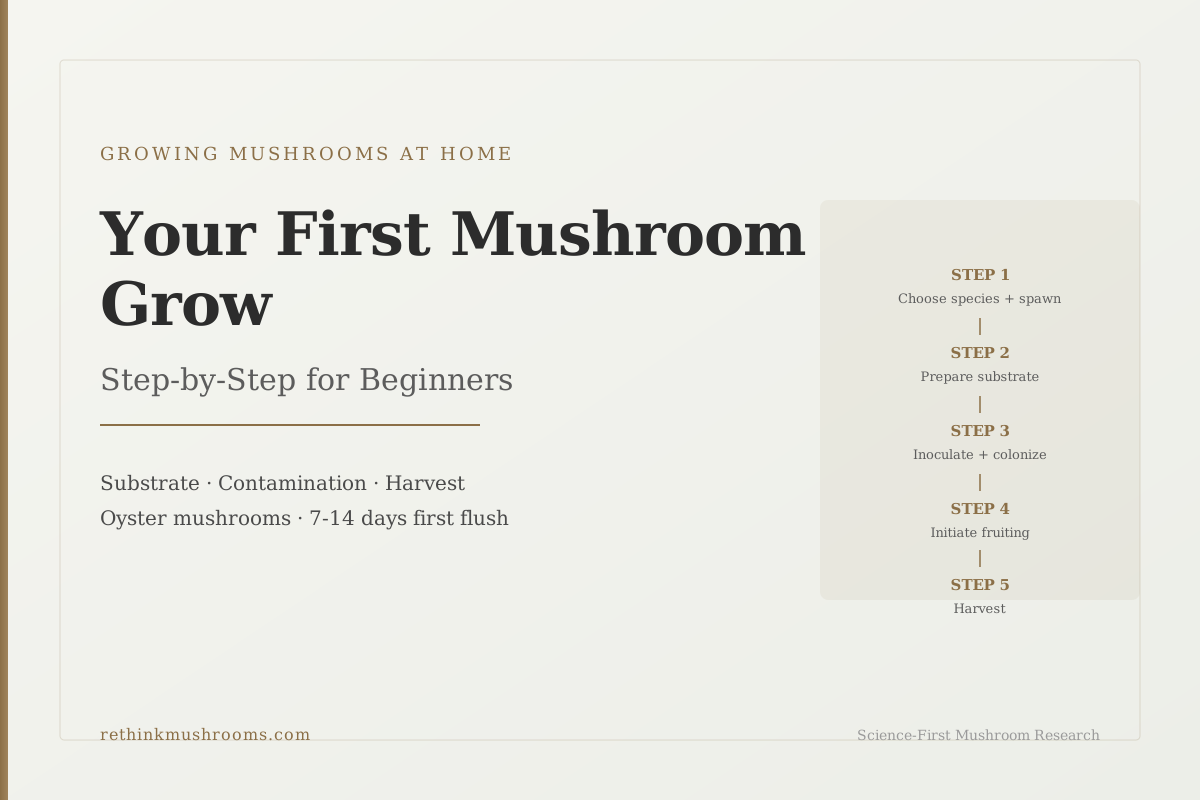
The Five Steps to Your First Harvest
This is the complete sequence for a first oyster mushroom grow. Timeframes are estimates for typical home conditions.
Step 1: Obtain spawn (roughly 5 minutes of decision-making)
Spawn is mushroom mycelium that has already colonized a carrier material, usually grain or sawdust. Think of it as a starter culture. You introduce spawn to your substrate to begin colonization. Grain spawn, which uses wheat berries or rye grain as the carrier, works well for oyster mushrooms and transfers easily to straw or coffee grounds. Sawdust spawn is an alternative, slightly slower to transfer.
Buy from a reputable supplier who stores spawn at refrigerator temperatures and guarantees the mycelium is alive at time of shipping. Spawn can be used for 2 to 4 weeks after purchase if kept refrigerated.
Step 2: Prepare your substrate (1 to 2 hours active time)
For straw: chop into 2 to 4 inch lengths and pasteurize (not sterilize) by submerging in water heated to 160-170°F for 60 to 90 minutes, or by field-capacity cold water lime pasteurization (pH 12 for 18 hours). Pasteurization kills competing organisms without destroying the substrate's nutritional profile. Let the straw cool completely before inoculating.
For coffee grounds: they are already pasteurized from the brewing process and can be used within 24 hours of brewing. Mix with 20 to 30% chopped straw or cardboard to improve air exchange.
Step 3: Inoculate and seal (30 minutes active time; 2 to 3 weeks waiting)
Mix cooled substrate with spawn in a ratio of roughly 10-20% spawn by volume. The more spawn you add, the faster colonization, but above 20% the cost increases without meaningful speed benefit. Load into filter patch bags (grow bags with a plastic filter that allows air exchange), leave a few inches of headroom, and fold or seal the top.
Colonization environment: 65 to 75°F, out of direct light (darkness is not required, but direct sunlight raises temperature unevenly). Expect to see white mycelial growth spreading through the bag within 4 to 7 days. Full colonization takes 2 to 3 weeks. The colonized block will look white and firm throughout.
Step 4: Initiate fruiting (environmental trigger; 3 to 5 days for pins to appear)
Once the block is fully white, it needs a change in conditions to trigger fruiting. For oyster mushrooms: move to 60 to 70°F (slightly cooler than colonization), cut several 2 to 3 inch X-shapes in the bag surface to create exit points for the mushrooms, and begin misting the cuts twice daily to maintain 80 to 90% relative humidity at the surface. Fresh air exchange matters: open the grow area briefly 2 to 3 times per day, or use a small USB fan on a timer pointed away from the block to keep CO2 from accumulating.
White pins (primordia) should appear at the cut sites within 3 to 5 days. They will grow rapidly.
Step 5: Harvest at the right moment
Harvest when the caps are fully formed but before the edges begin to roll upward or the gills beneath the cap begin releasing spores. The visual cue is the moment the cap edge stops curving downward and starts to flatten. At this stage flavor, texture, and compound density are at their peak. Twist and pull gently, or cut at the base with a clean knife. A second flush typically appears 7 to 14 days after the first, from the same block.
The One Thing That Kills Most First Grows: A Green Mold Called Trichoderma
Green mold in a mushroom grow is almost always Trichoderma, a genus of fast-growing soil fungi that is a universal competitive organism in any humid, substrate-rich environment. It appears as green or blue-green patches on the substrate or on the outside of the bag. If you see it, that section of the grow is lost.
Most beginner guides say "maintain clean technique" without explaining what Trichoderma actually is or how it gets in. A 2019 study by Kim and colleagues isolated and characterized the Trichoderma species responsible for contamination in indoor mushroom grows using sawdust media, and found that the primary contamination vector was airborne spores, not surface contact with tools or surfaces.[2] The spores float through indoor air, settle on exposed substrate, and establish before the mushroom mycelium can outcompete them.
This changes the contamination prevention calculus. Wiping down your counters with alcohol is useful, but the more important intervention is minimizing the exposure window when your substrate is open to room air.
Contamination prevention checklist:
- Inoculate in a still-air environment: no fans running, no open windows, no foot traffic through the space during work. A small tent or box creates still-air conditions without special equipment.
- Work quickly: the less time substrate spends exposed, the shorter the window for airborne spores to settle.
- Wipe surfaces and your gloves with 70% isopropyl alcohol immediately before handling substrate or spawn.
- Keep your grow space separate from kitchen composting, plant soil, or other high-fungal-load environments; these are Trichoderma reservoirs.
- If you see green mold: remove the contaminated bag from the grow space immediately, seal it in plastic, and discard. Trichoderma spreads by releasing more spores.
The same airborne contamination logic applies to other competing organisms. Green is Trichoderma. Orange or pink is Neurospora, another common competitor. Both arrive primarily by air.
How to Tell When Mushrooms Are Ready to Harvest
The most common beginner mistake is harvesting too early (the mushrooms look almost ready) or waiting too long (they release spores and become bitter). The correct harvest window is narrow but visually clear once you know what to look for.
The right moment: the cap has fully formed and separated from the stem, the underside shows developed gills, but the outer edge of the cap is still curving slightly downward. For oyster mushrooms specifically, the cap rim waves outward but has not yet flattened.
What happens if you wait too long: the cap edge flattens or curls upward, the gills darken, and the mushrooms begin releasing fine white or gray spore powder. Spore release does not make mushrooms unsafe to eat, but it affects flavor and indicates you are past the peak window. The powder can also trigger respiratory irritation in sensitive individuals if released in quantity in an enclosed space.
After harvest, remove all mushroom bases and any remaining pins that did not develop fully. Mist the surface gently and allow the block to rest for 7 to 14 days before the next flush. Most oyster mushroom blocks produce two to four flushes before the substrate is exhausted.
Why the Substrate You Choose Affects More Than Just Growth Rate
The choice of substrate is typically presented as a practical question: what grows oyster mushrooms fastest, or what is cheapest? But substrate choice has a second-order effect that most beginner guides skip: it affects both the safety and the compound content of what you harvest.
On safety: Ab Rhaman and colleagues reviewed the evidence for heavy metal bioaccumulation across mushroom species and found that the mushroom's uptake of cadmium, lead, mercury, and arsenic from substrate is not passive; mushrooms actively translocate heavy metals, and the concentrations in fruiting bodies reflect what was in the growing medium.[3] Unknown or cheaply sourced industrial byproduct substrates carry the highest risk. Traceable organic straw and food-grade coffee grounds are lower-risk starting points.
On compound content: Nguyen and Ranamukhaarachchi found that grain source and substrate type produced measurably different mycelial growth rates in oyster mushrooms, with some substrates outperforming others consistently across experimental conditions.[1] Faster, denser colonization generally correlates with healthier mycelium and higher fruiting body quality. The substrate is not just a growth medium; it is the nutritional environment from which the mushroom builds itself.
For a deeper look at how substrate composition affects the specific health compounds in medicinal species, see How to Grow Lion's Mane at Home: Complete Guide and How Substrate Composition Affects Mushroom Health Compounds.
For a side-by-side comparison of grow kits versus DIY substrate builds, see Mushroom Growing Kits: Are They Worth It? A Comparison.
The Bottom Line
A first mushroom grow does not require special equipment, rare ingredients, or significant cost. Oyster mushrooms on straw or coffee grounds, following the five-step colonization-to-fruiting sequence, is the most forgiving path to a first harvest. The two variables that determine whether it works are substrate quality (which affects both safety and yield) and contamination prevention focused on minimizing airborne mold exposure during inoculation.
Frequently Asked Questions
Sources & References
- 1. Source details for this reference are not yet available.
- 2. Source details for this reference are not yet available.
- 3. Source details for this reference are not yet available.
- 4. Source details for this reference are not yet available.